How to Connect Ceiling Speakers to Your TV
This post may contain affiliate links which means that, if you choose to make a purchase, I may earn a small commission at no extra cost to you.
Ceiling speakers are an affordable way to boost your listening experience. Instead of burning a hole in your pocket with an over-expensive stereo system, you can simply install a ceiling speaker at a fraction of the price without sacrificing much of the sound quality. Ceiling speakers are often underrated but, from one audiophile to another, I assure you, they offer great value for money. Although they may not be as good as a home theater, it’s the best you can get on a budget.
To connect a ceiling speaker to your TV, you will have to mount it on the ceiling and then run the wire to your television. It’s better to keep the wires behind walls because dangling wires destroy the decorum of any good-looking room. You can also use Bluetooth or WISA to connect to the TV.
You must exercise caution while setting up the device. In case you are unsure, call in a professional to do it for you. Because if you are not careful you can leave a mess, even destroy your ceiling in the process.
How to set up the ceiling speaker and connect it to your TV?
To set up a ceiling speaker you will have to create a hole in the drywall ceiling. You must already have a wall-mounted speaker socket where you will connect the speakers with the amplifier. Follow these steps to set up the speaker:
1. What you will need for setting up the speakers: A speaker alongside a wall clamp that holds it against the ceiling, wire cutters, measuring tape, drill machine, templates to map the spot, sticky tape, speaker wires, a drywall knife, glasses, a walabot to detect joists throughout the wall and a mask to protect your eyes and mouth, two long screws to mark out the spot where you’re installing the speakers and something (like a box) to catch all the debris.
2. Disconnect your amplifiers or you could end up shorting it out. Reconnect everything once the installation is finished.
3. Take the measuring tape and place a mark at a distance of 2 feet off the wall. Actual distance may vary depending on the sofa (or other furniture) placement in your room.
4. Attach the walabot to your smartphone and switch it on. Press it against the wall and look for joists. Most joists are 16” apart but depending on the house, they can range between 12” to 24”. Your goal is to install the speaker in between any two joists.
5. Once you have the location, fix the circular templates on the ceiling with sticky tape.
6. Drill in two screws at the center of each circle and head over to the attic to check if the hole placements are perfect or not.
7. You should already have a speaker socket pre-installed behind your television. If not, then you would have to create a makeshift outlet for the wires.
8. Once you have a socket and the necessary wiring in place, start cutting out the hole. Use the templates as a reference. If you’re afraid of damaging the ceiling, fix a plywood circle inside the attic directly above the hole. The plywood will act as a guide and prevent accidental slip-ups.
9. Place the speaker within the hole and drill in the clamps before placing the speaker cover.
10. Connect all the speaker wires into the amp before powering it up.
Your ceiling setup is now ready to rock your world. It’s not your regular DIY task, so you should consider asking for professional help especially if you have not installed a speaker socket. My friend tried to go at it alone and ended up damaging the internal wiring while he was trying to route the wires from behind the TV to the attic. He could even have electrocuted himself but fortunately, that was not the case.
The speaker is best used for medium-sized bedrooms and living areas. You will not feel the effects in a large room. I have been juggling with the idea of installing a pair at my younger cousin’s bedroom and was recommended the Polk Audio RC80i 2-way ceiling speakers by a bunch of my friends. They are great for small to medium-sized rooms both in terms of loudness and clarity.
How to connect a Bluetooth ceiling speaker to your TV?
Much like wired speakers, you can also connect Bluetooth ceiling speakers to your television. First, check if your TV has inbuilt Bluetooth. If not, check if it supports a Bluetooth transmitter. Once you’ve ticked off the necessities, it’s time to get on with the setup process.
1. Begin with creating a hole in the wall same as before, place the speaker inside, lock it in place, and fix the cover.
2. Some Bluetooth speakers have a dedicated transmitter. So before placing the speaker, you will have to connect the transmitter and place the whole setup inside the ceiling before covering it up.
3. Now set up the Bluetooth receiver in your room and connect to it via your TV’s Bluetooth.
4. You should now be able to play music directly from your TV.
5. Some speakers can even connect to your TV without any dedicated transmitter or receivers. Simply install it and they are ready to rock right out of the box.
Bluetooth speakers are a bit more expensive compared to wired ones and the ease of setting it up does come at a cost. For instance, the sound quality may not be at par with wired speakers with an occasional lag now and then.
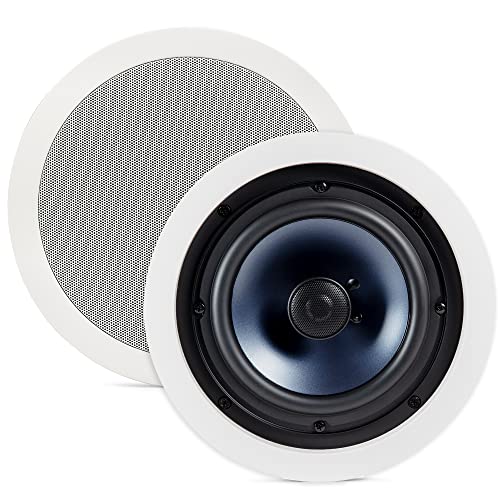
I recommend the Pyle 6.5” 4 Bluetooth Flush Mount speaker because it’s cheap and does not require any dedicated transmitters. However, it does not have dedicated volume control. The sound is controlled by the television’s audio and is quite decent given the price point. Also, the volume thing is not that big of a tradeoff once you get used to it.
How to set up WiSA speakers?
WiSA is a brand new technology that utilizes an exclusive communication channel different from both Wi-Fi and Bluetooth. It’s similar to setting up a Bluetooth connection. Simply place the speakers and start playing music like you would in any other speaker.
WiSA operates on an exclusive frequency so it does not interfere with any other Bluetooth/Wi-Fi device. It does not take a bite out of your Wi-Fi or your Bluetooth connection. WiSA supported TVs have this feature built into them and all you have to do is connect to it. It’s 29 times better than Bluetooth and delivers high-definition audio up to 24-bit/48kHz or 24-bit/96kHz.
F.A.Q.
How many ceiling speakers do you need in a room?
Usually, ceiling speakers come in pairs, one for the left channel and the other for the right, ensuring stereo quality. Although there is no set rule, experts suggest you use one pair of speakers for rooms that are larger than 3×3 meters and two pairs for rooms larger than 5×5 meters.
Where should you position ceiling speakers?
For single speaker installations, you should place them at the center. For two or more speakers, the best placement is equidistant from each wall and at least 1 meter away from each other. You can also use angled or pivoted tweeters for unconventional room sizes.
How much space do you need for ceiling speakers?
It varies depending on the manufacturer. The slimmest speaker requires a mounting depth of just 36mm and a cutout diameter of 196mm. There are also speakers with a depth of 160mm and cutouts of up to 250mm.
Read specifications before buying to avoid bagging an oversized or undersized product.
Conclusion
Ceiling speakers are not a brand new concept, but they are an underrated once and unknown outside of a niche community of music enthusiasts. It’s the way to go if you are looking for an affordable way to enhance your listening experience and hopefully, this article has helped you with everything you need to know to finish the installation process. Until next time. Happy listening.