How to Prevent Chromecast From Buffering
This post may contain affiliate links which means that, if you choose to make a purchase, I may earn a small commission at no extra cost to you.
Google Chromecast is my first and only choice when it comes to media streaming to different devices. It’s not just with Chromecast devices. When I’m shopping for other stream-capable electronics, I look for the Chromecast Built-in icon or feature. However, it sucks when I switch to 4K and the movie starts buffering in the middle of a scene that has me on my toes.
Fortunately, there are several ways to prevent Chromecast from buffering. You can close other apps that hog data, lower the quality, stream downloaded content, switch to a better ethernet adapter, change WiFi channels and use other such methods to prevent Chromecast from buffering.
Let’s check out all those methods below.
Lower the Quality
Quality settings are often the main reason for buffering. My TV is powerful enough to play 4K videos and my Chromecast device also supports it despite its modest size. However, they can’t perform more than my network allows.
When I switch to Ultra HD or 4K videos on Netflix, Youtube, or other apps that rely on the internet, my device uses the network bandwidth. Data is downloaded and routed through the Chromecast to my TV. With higher quality streaming, it needs more data. Here’s a table showing data consumption by various streaming apps for different resolutions.
| Streaming Apps | 480p | 1080p(Full HD) | 4K(Ultra HD) |
| Youtube | 562.5 MB per hour | 3.04GB per hour | 15.98GB per hour |
| Netflix | 700 MB per hour | 3GB per hour | 7GB per hour |
| Amazon Prime Video | 800 MB per hour | 2GB per hour | 6GB per hour |
| Hulu | 680 MB per hour | 2.7GB per hour | 7 GB per hour |
| Disney+ | 700 MB per hour | 2.0GB per hour | 7.7GB per hour |
The average home internet speed in the US is around 99 Mbps and we need just around 25 Mbps for smooth 4K streaming. While that speed is enough for those who are rocking the single life, it isn’t nearly enough for families. My home WiFi is connected to multiple devices of multiple family members and everyone is consuming data on their phone, computer, or TV. That adds up and it leads to the annoying buffering logo on my TV.
In such cases, I’ve found that lowering the streaming quality resolves the problem. Different streaming platforms have different methods of lowering quality. Let’s see how we can change it on Youtube.
To adjust streaming quality on the Youtube app on your phone:
- Make sure you’re casting content from the Youtube app on your phone to your TV via Chromecast.
- While playing a video, tap on the three-dot icon at the top left corner.
- Select Advanced from the pop-up menu.
- Select a lower resolution like 1080p or 720p for the video.
Other apps have similar methods of changing quality while streaming a movie. While Youtube specifies the resolution, other apps may use easy-to-understand names like SD, HD, or Ultra HD.
Close data hogging apps
When I’m streaming content to my TV from my phone, I often forget that many apps like to suck up all the available bandwidth. The same holds when I’m streaming content from my laptop. The easy solution is to close those apps.
For instance, my phone and PC are set up to download software updates in the background and that doesn’t show up unless I check my notifications. If my movie starts buffering, I check the notifications on my phone, laptop, or other devices I’m streaming from and pause the updates or close the app that’s using a lot of background data.
I also check out if there are any active downloads on my phone or computer on a browser or an app and stop them.
Stream downloaded content
When you stream content from your phone or laptop to the TV via Chromecast, the hardware actively downloads data as you view it. Moreover, some of that data may be lost in transmission as it makes its way to your TV via multiple devices like the WiFi router, your phone, the Chromecast device, and finally your TV.
This tests my network connection to the limit and sometimes places a chokehold that leads to buffering. That’s why I prefer to stream local data or downloaded content. Most popular streaming apps support offline viewing and allow us to download the movies on the app. For instance, Youtube, Netflix, and Amazon Prime Video have dedicated download buttons for movies and other content on their app on various platforms.
That doesn’t mean we are limited to streaming downloaded content from those streaming apps. There are several compatible software that allows casting local videos to the Chromecast. VLC is my personal favorite when I want to stream a movie locally downloaded to the hard drive on my laptop.
To cast movies from a Windows computer to your TV via VLC:
- Make sure that you’ve set up and connected Chromecast devices to your computer and you’re on the latest version of the VLC media player.
- Right-click on a downloaded movie or video from your hard drive and select Open With followed by VLC Media Player.
- Once the video starts playing, right-click on the screen and select Playback followed by Renderer.
- Now you should be able to see all the Chromecast devices connected to your computer. They may be named “Chromecast Bedroom” or “Living Room TV”.
- Select one and the video should start playing on your TV.
Use an Ethernet adapter
While WiFi is convenient and lets us get rid of messy cables, it’s not perfect. There are too many WiFi-enabled devices in my home. From my phone and computer to my smart bulb and smart plugs. Chromecast relies on the same technology. Surfers affect network congestion and too many connected devices might affect the bandwidth and bring the doomed buffering logo to sight.
I fixed this issue by rolling back on years of progress and relying on the trusted wired connection. That’s where the Ethernet adapter comes in. Since I have a Chromecast 2.0, I had to buy this adapter for it. However, you don’t need to buy one if you have a Chromecast Ultra. It comes with an Ethernet port in the power adapter.
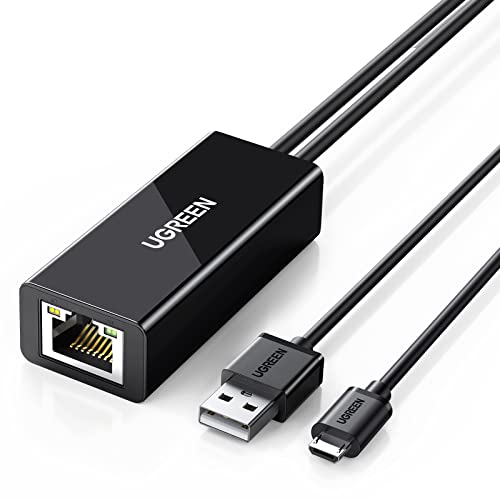
After connecting my Chromecast to the adapter, I used a long Ethernet cable to connect the Chromecast to my WiFi router. This provides the fastest internet speeds available on my network to the Chromecast and eliminates all wireless interference. A wired connection is always superior to a wireless connection when it comes to bandwidth and signal interference.
Change WiFi band and channels
WiFi technology has improved over the years and some of the most entry-level WiFi routers are now powerful enough to handle multiple devices without an issue. However, with so many devices connected to the 2.5 GHz band, your router has a hard time switching between them and maintaining a lag-free high bandwidth connection.
That’s why I keep my Chromecast and my phone, laptop, or any other device I’m streaming from connected to the 5GHz bandwidth. If you don’t have a dual-band router, consider getting one. It’s worth the investment and also supports higher bandwidth and internet speeds.
You can also switch to a different channel for streaming on Chromecast. Both the WiFi bands have several channels available to them. The router broadcasts over these channels and some of them get congested with multiple connections. You can fix this issue with a tool like the WiFi Analyzer tool. This tool is available for Windows computers. However, there are alternatives like NetSpot and WiFiSCanner for Mac.
Here’s how you use it:
- After you download and install the program, go to Start and type WiFi. Select the WiFi Analyzer tool from the search options.
- Once you launch the program, it will automatically search your network.
- Click on the Analyze tab.
- The program will show you graphs that display the strength of various channels and their data usage.
- You can use this info to hunt down the channel with the least number of connections.
- If the graph seems too complicated, click on Recommendation.
- You’ll see all the channels rated from 1 to 10. The top channel would be the least cluttered.
- Select a channel and check your router for the administration screen’s IP address, username, and password if you don’t know it already.
- Enter the IP address in your browser and hit Enter. After you log in to your router with the admin id and password, you can change to a different channel. There are different models and the method for switching to a channel would be different for each one. Check your router’s manual or documentation for the method.
Conclusion
All these methods have helped me to make Chromecast streaming more enjoyable without any buffering and I hope it does the same for you. However, sometimes the problem isn’t on my end. If there is something wrong with my ISP or on the streaming platform’s servers, I experience buffering issues. That leaves me no option but to wait for those third parties to fix the problem on their end.