Can Beats Headphones Be Repaired? An Owner’s Guide
This post may contain affiliate links which means that, if you choose to make a purchase, I may earn a small commission at no extra cost to you.
Do you have a set of Beats by Dre headphones? If you do, you’re used to enjoying great sound. You also know that they are really some of the best headphones out on the market today. They aren’t cheap, but most of us consider our music well worth the price. But that doesn’t mean we want to replace headphones if we can fix them.
Can Beats headphones be repaired? Yes. You can repair many of the common breakages in Beats headphones, from the headband to the hinges and from the speakers to the earpads. Most of these repairs can be done at home, with common household tools and supplies.
To prevent having to replace your Beats, you just have to learn how to make some common fixes. Nothing too technical or mechanical. In this owner’s guide, we are going to show you the steps in common problem areas of the headphones. If something’s wrong with your Beats, odds are we have a way to help you fix it. Let’s get started!
What Repairs Can Be Made on Beats Headphones?
Don’t panic if your Beats aren’t working as they should. Many times, it’s a common issue that can be repaired. Here are some things that can be done to save you from having to replace them. We’re going to give you directions for how to do this all at home, with household tools and supplies that you probably already have around your home.
- Repairing a cracked or broken headband
- Fixing the Solo and Solo HD hinges
- Fixing the Solo 2 headphone speaker
- Replacing an ear pad
Repairing the Beats Headband
Not being able to wear your headphones due to a broken headband is a bit agitating, but don’t worry too much. You’re in good hands, and we’re going to show you how to fix the headband and get back to listening to your tunes or podcasts. Here’s the step-by-step.
Step One: Gathering the Necessary Materials
First, before you begin, you are going to need to gather up everything that you are going to need to begin preparing your headband for the repair. Having it all on-hand at the start is the only way to go. No running around last minute, trying to find a tool. OK, here is what you will need:
- Stiff packaging plastic
- A small knife or box cutter.
- Superglue or contact cement
- Scissors
- Rubbing alcohol
- Small clamps
Step Two: Preparing Your Beats Headband To Be Repaired
Before you begin cutting and gluing things together, you have to thoroughly prepare the Beats headband before going further. Here’s what you will need to do:
- Cleaning the headband thoroughly. Pay special attention to the area of the break. You want to take the rubbing alcohol and use it to wipe down the headband. Make sure the break itself is clean and free of any grease oil or debris before you begin to repair it or it may not come back together properly.
- Take the plastic that you picked up earlier and cut it to the width of the headband. The plastic will need to be cut to about one and a half inches long, so be sure to take a marker to mark your cutting points before you do. Measure twice cut once. Trim the plastic to make sure that there are no sharp edges remaining after cutting.
- Look at the break and make sure that you can identify the flat surfaces on the underside of the headband. You need to glue the surfaces in the right place.
Step Three: Repairing The Headband
This is where you actually start taking the rest of the materials gathered to start repairing your Beats headband. Make sure that you have followed all the instructions in prepping the headband to be repaired before moving onto this next step.
- Take the super glue or contact cement and apply it to the flat surfaces beneath the break. You will also need to apply the super glue or contact cement to the broken edges as well. If you’re using super glue – watch your fingers!
- After applying the glue, you will need to squeeze the broken edges and flat surfaces together with adequate pressure to ensure that they are bonding together. Hold it in place for a bit.
- Next, you are going to have to apply the super glue or contact cement to the top of the headband. Make sure that when you apply the glue or contact cement that it is of the same length as the piece of plastic that you have cut out earlier.
- Now, you will take that piece of plastic and apply it to the top of the headband where the break and glue are. Make sure that the plastic is centered on this area and that there are no sharp edges exposed as noted earlier.
- Finally, take the clamps and use them to clamp the plastic and flat surfaces together. Be sure to allow the clamps to sit in this position for about 30 minutes to ensure that the adhesive has done its job and bonded everything together. If you can get away with letting them sit longer than that, even better.
Great job! If all went as expected, your headband is no longer broken.
Fixing Your Beats By Dre Solo And Solo HD Hinges
This is for those who have Beats Solo and Solo HD headphones. These Beats headphones are a great product, but sometimes the hinges on them can loosen or not hold properly. Follow these simple steps to repair this commonly-occurring inconvenience and get back to listening to your music as normal.
So, you know, you will need a pair of cutters or pliers with pointed ends. Here’s the repair step by step:
- You are going to have to take a look at the side of the Solo headphones to locate a pin. That pin, in particular, should have a hole underneath it. If this pin becomes depressed over time, it will make the hinges on your Solo headphones become loose. Be sure to locate it, as that is going to be the issue.
- Very carefully take your pliers and push up on the pin – carefully. It is extremely important that you do this carefully as this is the pin that holds the hinge on the Solo together. If you happen to accidentally break this pin your hinge will fall apart. Don’t lose it either!
- Once the pin on one side is pushed up to the proper position, you need to do the same with the pin in the opposite hinge. Once again, be sure to do this carefully to not break the pin. Once you have done this, you will see a noticeable difference in how the hinges are holding up. This is all it takes; your Solo headphone hinges should be repaired.
- If they are still loose, double-check to make sure that the pins are pushed into their proper place and are no longer depressed. If the pin is broken, you can get a replacement for about $13 online or at a local speaker shop.
Fixing A Beats Solo 2/ Solo HD Speaker That Has Gone Out On One Side
Occasionally, you may run into the issue of one of your headphones going out, and if you don’t know what to do, this can be a stressful situation. Without speakers, your headphones are as good as dead.
Don’t worry; there is a fix for that as well. When a headphone’s speaker goes out, it is typically due to the wire in the headphones malfunctioning. Here, you’re going to learn how to fix that broken wire and get back to listening to your music.
Step One: Gather Your Materials For The Repair
To repair the speaker in your headphones, make sure that you have these materials ready at standby:
- Screwdriver
- A soldering kit
- A multimeter
- Smartphone with a camera
- Replacement wire
Step Two: Prepare Your Solo 2/ Solo HD Headphones For Repair
To begin the repair, you are going to have to take your headphones apart and have a basic knowledge of electronics in order to make this repair. Be sure to follow these directions, and you should be able to complete the repair.
You may want to snap some photos as you disassemble. It’s the easiest way to remember where things go. It’s amazing how quickly we forget what things looked like “before.”
- With a flat head screwdriver, you are going to remove the ear pad. Be careful as you do this to not cause further damage to the headphones and potentially have to replace the earpad. The ear pad is held in place with scotch tape so it should not be too difficult to remove.
- After you remove the ear pad, you will see three screws that hold the headphone’s speaker in place. With a screwdriver, you will need to remove these three screws to get to the area with the black tape. Put them someplace safe. They’re small.
- After the speaker is removed, you will see screws beneath the black tape. Take a Phillips screwdriver and remove these screws. Once to remove the screws, you will be able to take the headphones apart.
- Finally, during the disassembly, you will see a plastic covering that is connected to rubber mounts. You will need to remove this plastic covering from the rubber mounts and remove the glue with the soldering remover. Now you should able to see the covering on the wire that is damaged.
Step Three: Repairing The Broken Solo 2 Headphone Speaker
Now that the headphone is disassembled, you will need to use the camera on your smartphone to take a picture of the head[phone’s internal circuitry.
This is important to ensure that once you are ready to replace the wire that everything goes back to its proper place. Failure to put things back can cause the headphone to continue not to work and repeating these steps all over again.
- After removing the plastic covering and the glue that was covering the wire, you should be able to see it up close. Be sure to have taken a picture of the internal circuitry before you begin to remove it.
- When it comes to the wire, you should see smaller wires of two colors red and green. This is important. Take a set of tweezers and pull the wires out. Do not cut anything. This will make the wires too short and difficult to remove.
- With the new wire that you have purchased, you need to strip off a portion on it to leave the cables inside of the wire exposed. You should see a total of up to three different colors: red, green, and white. The white wire is for insulation. Be sure to separate the three colors and then twist the ends.
- Take the red and green wires and place them in their respective spots, based on the picture that you have taken of the headphone’s internal workings. It is okay to strip off the coloring at the ends of the wires. That is just for the purpose of providing insulation.
- With the soldering kit, solder the wires into place. This will keep them connected to the circuit board within the headphone. Also, replace the rubber mounts back to their original positions with the screws.
- After soldering the new wire into place, be sure to place electrical tape over the wires. This provides insulation of the electricity and keeps the headphones from shocking you while you’re trying to listen to music
- Here you will check whether or not the headphones are working properly and if you need to go back through any steps.
- If the headphones are working, you can proceed to glue the loose bit of wire to the case of the headphones.
- Proceed to reassemble the casing and solder the wire to the headphone’s speaker.
- Finally, you will screw the speaker back into place on the headphone. After you have done this, test the headphones yet again to make sure that the sound quality in both of them are the same. If they sound normal, then your headphones are working!
How To Replace A Beats Studio 2.0 Ear Pad
Replacing the ear pad on any Beats headphone set is probably going to be one of the easiest fixes that you will ever make. It honestly only takes a couple of minutes no matter if it’s one of the Solo sets or the Studio 2.0 earpad.
Since we already covered removing and replacing the Solo 2/ HD’s ear pad in speaker repair in the last section, we’ll focus on the Studio 2.0 since its replacement is a little different.
- You will need to pinch and squeeze the ear cushion between your thumb and index finger.
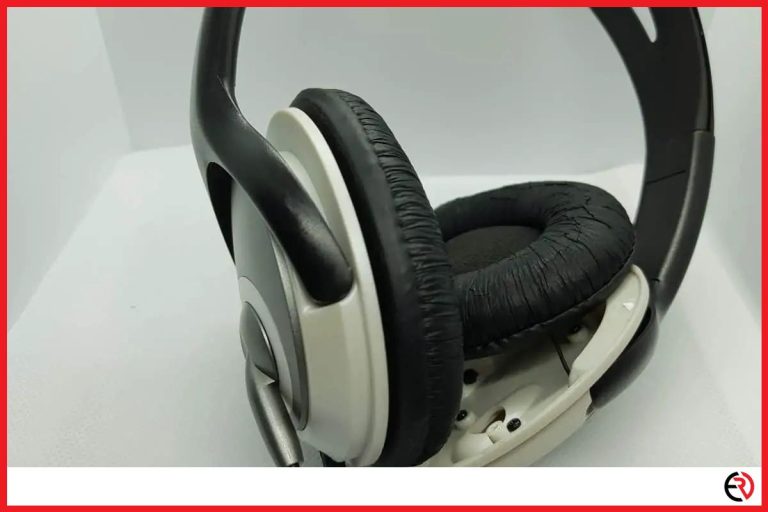
- When you are removing the ear cushion for replacement, especially for swapping them out for cleaning, you will need to be very careful when pulling them off. They will rip or tear if you do not proceed with care during the removal process. With that in mind, they are very easy to pull off with little effort, so don’t try to tear them off. Pull gently and away from the earpiece.
- It is recommended that you use double-sided tape to place the ear pad back onto the headphones. This is for if you are planning on taking them off again for cleaning. However, if you intend to have a permanent solution to keeping them there, you can use super glue. Be careful to not use too much as it is sticky and can be visible if you use too much.
- When you are taking the time to place the replacement ear pads back onto the headphones, make sure that the pads are aligned with the little knobs that are visible once removed. If it is placed on there accurately and correctly, it will not go anywhere. It will also make a pop noise once it is pressed on correctly and securely.
Conclusion
I hope you enjoyed this owner’s guide to Beats headphones. Now you don’t have to stress too much if something seems to be broken and stops working. With a soldering kit and about $25- $30 you can get a lot done and not have to worry about the cost of having to replace your Beats headphones for years to come.
If you find out there is something more wrong with your headphones and none of these fixes work, there are actually shops that may be able to help. Home audio stores and speaker repairs shops are a good place to start.
Your Beats headphones are an investment, and before you replace them, repairing is a great option, whether you do it yourself or call a professional.


