6 Reasons Why Headphones Keep Breaking (With Fixes)
This post may contain affiliate links which means that, if you choose to make a purchase, I may earn a small commission at no extra cost to you.
At some point in time, all headphones will break. It’s a pain to deal with, but it happens. Normally we go to the store and get them replaced but what if there was a way to save that money and put that towards something else? Or what if there is a way to help keep them from breaking in the first place? Wouldn’t that be great?
6 reasons why headphones keep breaking are:
- Rolling Over the Headphones Cord
- Letting the Cord Dangle
- Winding the Cord into Knots
- Traveling Without A Case
- Sleeping with Them On
- Dropping the headphones on the ground
Headphones are devices with a lot of tiny parts and intricate circuitry. Eventually, they are going to break, no matter how careful you are. With the help of this guide, you should be able to increase the lifespan of your headphones. Let’s go over how to avoid the damage in the first place – and what to do when it happens.
Common Reasons why Headphones Breaks
Here we will list the most common reasons why headphone breaks and what you can do to prevent it.
Reason #1: Rolling Over Your Headphone’s Cord
Headphones can have some pretty long cords. Up to 10 feet long actually. This is great for when you want to set your listening device on the table sitting across from you. However, it is horrible for when you are out and about or even at the grocery store.
Headphone cords are long and, whether you’re working at a computer or walking around a store, it’s easy to roll right over them. Hit them just right, and you may sever the cord, making your headphones useless.
How Do I Prevent This?
To prevent rolling over your cord, you need to keep it off the ground and roll up any excess cord that may get damaged. Store it away in a safe spot whenever possible.
Reason #2: Letting Your Headphone’s Cord Dangle
When you let your headphone’s cord dangle, you are creating not only a trip and tug hazard but also run the risk of creating a fold in your headphones, this is visited again later, but the more you dangle your cord, the more stress you will put on it until it eventually breaks.
How Do I Prevent This?
This is a matter of self-responsibility. Tell yourself that you made an investment into these headphones and be careful of letting it hang off of surfaces.
Reason #3 Winding the Cord into Knots
Some people do this as a habit or in an attempt to make their cord a bit shorter. If you continue to do this, you will cause your cord to have the same issues as folding and the stress will eventually break or sever the cord.
How Do I Prevent This?
If your cord is too long and you need to shorten it, carefully roll it up in a manner similar to how you first received it. This will help keep the cord safe and assist in preventing undue stress on it.
Reason #4: Traveling Without A Headphones Case
Headphone cases are designed to keep your headphones safe from the elements and keep them out of environments with excess moisture. Keeping them in a case will also protect them from other hazards such as falling.
How Do I Prevent This?
To keep your headphones protected, keep them in the case they came with when not in use. If the headphones, didn’t come with one or you don’t have one, invest in a case to keep them safe.
Reason #5: Sleeping While Wearing Headphones
When you decide to sleep with your headphones on, you risk damaging them by putting weight on them and rolling around, which is putting stress on the cord. Headphones are not designed to support the weight of your head, and you can sever the cord in your sleep.
How Do I Prevent This?
When you get tired, take your headphones off and place them in the case. This keeps them safe from being crushed under your weight or accidentally pulling on the cord in your sleep.
Reason #6: Dropping the Headphones on the Ground
Dropping the headphones to the ground can seriously damage your headphones. Often I’ve listened to music on my computer, forgetting that I’m wearing my headphones. When I then walk out of the room, I feel my headphones slip off and crashing down on the ground. With fragile electronics inside the headphones, you just have to hope nothing got damaged.
Another common scenario is when you are doing an activity like jogging, you might drop your headphones if it sits too loosely on your head.
How Do I Prevent This?
Make sure your headphones are properly fitted on your head and be careful not tripping on the wires. If the damage is already done, maybe you should invest in some wireless headphones?
Common Problems and How to Prevent them from Happening
Problem #1: One of The Headphones Speakers Going Out
One of the most common and irritating breaks people have to deal with when it comes to headphones is one of the speakers in the headset going out. If you have ever had a pair of headphones, you know how annoying this can be. It’s a pain and it will happen at some point but can this particular malfunction in the headphones at least be delayed?
Why Does One of The Speakers on Headphones Stop Working?
The most common reason a speaker on your headphones has gone out is due to a shortage in its cord. This could have been done by pulling or twisting on the cord. The reason this is a problem is that when you frequently twist or pull on the cord or apply undue stress to it, the cord will eventually stop working.
When a pair of headphones’ cord stops working properly, the electrical signals that the device you are listening to can’t transmit electrical signals through the wire to where it is needed — the headphones’ speaker.
What Are Some Tips to Prevent One of My Speakers Going Out?
It’s always good news when you find out that you can prevent one of your treasured items from breaking prematurely, isn’t it? Below here, we are going to give you a few tips to help prevent the disaster of one of your headphones’ speakers from going out and have you listening to music (or books) with your treasured device longer.
Tip #1: Do Not Pull on The Cord of The Headphones:
A lot of people are guilty of this. I’ve even made the same mistake myself. When unplugging the headphones from the device you are listening to, DO NOT pull on the plug and yank it out of the device. Not only will this damage the headphones’ cord, but it may also cause damage to your device’s auxiliary port.
Instead, when you are finished with your headphones, grab the cord by the headphones’ auxiliary jack. If you yank on the cord itself, this will cause extra stress on the internal wires. This will lead to a loss in audio in one or both of your headphones’ speakers.
Tip #2: Treat Your Headphones with Care
A lot of times, people are reckless when it comes to the care of their headphones. They take them off, toss them aside, keep them all types of tangled up and knotted. This is going to lead to the headphones’ cords to begin shorting out. Here are some things that you can do to keep your headphones in the best shape and increase their lifespan:
- Don’t ever leave your headphones in a placed where they can be crushed. This includes the floor and by heavy objects that can be bumped into. You don’t want your headphones to stop working because you stepped on them or dropped your economics book on top of it.
- Never leave your headphones plugged into a device when you are not listening to it or wearing them. You could inadvertently damage both devices or accidentally yank on the cord or step on the headphones or earbuds.
- When the headphones are not in use, you should keep them stored in the same manner as when you got them. This means wrapping up the cord the same way it was in the package. You can keep the headphones securely wrapped using a rubber band or a bread tie if you have one.
- If you decide to wrap the cord around the device that you listen to, be sure not to have the cord plugged into the listening device. This will lead the cord to eventually have a short in it by creating a fold in the cord.
- If you fold the headphones’ cord enough times, especially while it is connected to a listening device, the wires within the cord will eventually become severed. You also put your listening device at risk of breaking as well. Remember: Always unplug the headphones when they are not in use.
- Never tie your headphones’ cables. Tying the cables can cause a lot of stress on the headphones’ cord and internal wiring. This can cause the same issues as when a fold is created in the cord. If it is done enough times, the wiring inside of the headphones’ cable will become severed.
- Never let your headphones hang or dangle when you are not using them. This can lead to them become caught on something and damaged by being snagged or violently tugged at abruptly. This also can be an issue for your listening device if the cord is plugged into it.
- Don’t ever go to sleep while wearing your headphones. This goes back to not putting them into a place where they can be stepped on or crushed. When you sleep with your headphones or earbuds, you risk causing direct damage to the headphones’ speakers by crushing them with the weight of your head or body. Beyond that, you risk damage to the headphones’ cable as well.
- Make sure you keep your headphones stored properly. That means that you need to keep them in a storage case. If they came with one, that is your best bet. If they didn’t come with a storage case, take the time to make an investment in a case to protect your headphones.
- If you use wireless headphones, be careful in how you stow or store them when they are not in use. Even though a cord is not an issue, you still risk damage to the wiring in one or both of the speakers by falling if are they not stored or stowed properly.
Problem #2 – Blown Speakers
You’ll know when you have a blown speaker in your headphones. Ever tried to listen to music on your headphones or in your car and instead of tunes playing you get a “Snap, Crackle, and Pop” from the breakfast cereal and a demon’s voice? That’s a blown speaker.
If you don’t listen to your music responsibly, that terrifying moment is bound to happen. Here are some tips to prevent your headphones from blowing out on you:
- Adjust your volume before turning off. Do you ever get into your car to find you forgot to turn down the volume from the last time you drove it? We’ve all done that before, and it can startle the heck out of you. Turn down the volume before plugging in your headphones, so you don’t blow the speakers.
- Keep the volume low until your headphones are on your ears. In regard to the volume, only turn it up once your headphones are plugged in and sealed to your ears. That’s better for your headphones and your ear health.
- Try not to blast your music. This means to play your music as loud as you can, this will blow the speakers over time and also affect your ability to hear. You may not care about being hard of hearing 5 years from now but unless you want to replace headphones due to blown speakers regularly, be my guest.
- Careful with the bass! Bass is a low-frequency sound that places an extreme amount of stress on headphones’ speakers.
- Make sure your headphones can handle your system’s output. If you ever use a high-end stereo system to plug your headphones into, you need to be sure that they can handle the extra power that is being outputted. Check your headphones’ safety guide to see what the OHMs are and if it matches up with the stereo system you want to connect them to.
Problem #3 – Broken Cords
This is the most common issue with broken headphones. The cords get heavily strained on a day to day basis. You should just be as careful as you can with the cords, but if you often use the headphones on the go, you will sooner or later have a broken cord on your hand.
In the next section, we will explain how you can repair a broken cord. This will save you a lot of money instead of buying brand new headphones.
How to Repair your Headphones
Ok, so it’s something wrong with your expensive headphones. You are low on cash, but you need your music! What to do?
Here is some step by step instructions on fixing your beloved headphones.
How to Repair Blown Speakers
If you happened to come across this guide AFTER blowing your headphones’ speakers, don’t worry. We’re about to walk you step by step in the repair.
#1 – First, in order to repair the speakers, you are going to have to open them up. They are normally held together by screws, but sometimes plastic clips are used. If they are held together by screws, you are going to need to use a screwdriver to remove them.
#2 – Next, you are going to need to use a craft knife to separate the plastic housing of the headphones and the speaker. To do this, you are going to need to carefully work the knife around the glued seams of the housing and gently lever them apart. Be careful when doing this or you could cause damage to the internal circuity and wiring of the headphones.
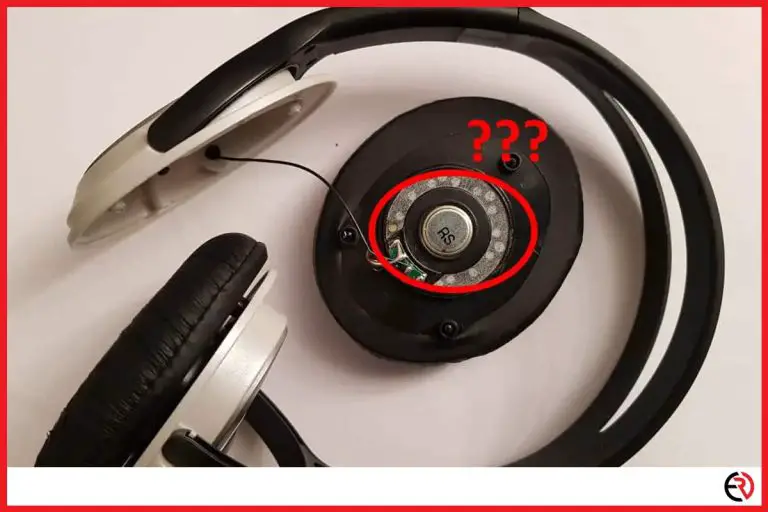
#3 – Carefully remove the speakers from the casing of the headphones as not to cause further damage. They will be easily identifiable as the round parts facing where your ears would be if you were wearing the headphones.
#4 – Inspect for any damage to the wires as this will most likely be where the problem is located. When you examine the speakers, you see wires soldered onto them Look to see if a wire is detached from the speaker and free-floating as this is easy to spot. You will also see a silver tag where the wire was supposed to be connected to, but no longer is.
#5 – You will need to cut the wire back by 5mm and use wire strippers to remove the plastic coating surrounding the wires in the cord.
#6 – Next, you will need to apply molten solder to the end of the exposed wire and reattach it to the silver tag that was exposed with a soldering iron and using the heat produced to fuse them back together before the solder has cooled. The heat will travel through the wire, so make sure that you don’t hold the soldering iron in place for too long.
#7 – After you have reattached the wires, check to ensure that the headphone speakers are working again. If they are working properly, go ahead and apply super glue or contact cement back around the seams where the headphones were dismantled and reassemble your headphones.
#8 – If your headphones still aren’t working after the repair, you will need to replace the cable. Follow the detailed list of instructions below to learn how to do so.
How Do I Replace A Damaged Headphone Cable?
When it comes to replacing a cable for headphones, the process is very similar to repairing a blown speaker with the exception of having to remember where certain wires go and having to replace the cable itself to bring your headphones to functionality.
For those of you who have a severed cord, remember when I said there is a section that will cover how to repair your headphones in the event of rolling the cable over and it gets severed? This section applies to you as well! Below is a step by step layout on how to replace your headphones’ cable when it is no longer viable.
What You Will Need:
• A quality replacement cable. The cost of this will run about $15.
• Self Setting Rubber: From research, a Suguru self-setting rubber is best as they come in a pack of 8 which will leave you with extras and run for about $20
• Solder and a soldering iron
• A solder remover
• Sandpaper (Sand grit is determined to be best)
• Wire strippers
• Wire Clippers
• Screwdrivers of various sizes
Step 1: Taking Apart the Headphones (Again)
If you hadn’t noticed in your research and reading, nearly all headphone repairs outside of the headband are going to require disassembly of the headphones. For wire replacement, it is also going to require a little bit of electrical know-how in order to get the repair done quickly and correctly.
After the screws are removed, you can pull the headphones apart, and this will expose their internal circuitry. You have to be careful here to avoid risking further damage to the internal circuitry of the headphones and possibly even do more harm than you will be able to fix on your own.
Step 2: Remove the Old Wire from The Headphones
Like it was said before, most headphones stop working due to a fault in the wire, so the objective is to completely remove and replace it. This is where your basic electronics repair skill comes into play.
Here, knowing where everything belongs is going to be extremely important here. Unless you have a photographic memory, you will need to take a picture to know where the appropriate wires belong. So be sure to use your smartphone to take a picture of the headphones’ internal circuity to keep track of where everything needs to go.
1. Using the clippers that you acquired earlier, use them to clip the wire where it is soldered into the headphones. After clipping the wire, go ahead and throw it away.
2. Using the soldering iron, heat the old solder that is on the contacts within the headphones circuitry until it begins bubbling. Be sure to repeat this step on all of the contacts within the headphones.
3. After heating all of the contacts, you need to use the solder remover to get rid of the solder on the contacts. You will need to do this as you are going to be placing some new solder on these contacts once the time is right.
Step 4: Prepare the New Wire to Replace The Old One
1. Now you will need to take the new cable and prepare it to replace the old one that was in the headphones before. With the clippers, clip off one end of the cable at one of the jacks that are for plugging the headphones in an auxiliary port.
2. You will need to use the wire stripper to strip the outer casing of the wire to expose its internal wires.
3. There should be 2 sets of wires inside of the headphone cables. There will be two different colors that you will see, and they should be red or green, and the other cable will be copper. Carefully separate these two wire strands from each other and then twist them together. If there are some white strands, don’t worry, these are for insulation, and you can trim these off.
4. The red or green coloration on the wires are used to insulate them. Use the contact cement to remove it from the ends, so they don’t interfere with the cable’s connection to the speakers when you solder them into place.
Step 5: Attaching the Replacement Wire
Remember when I suggested you take a picture of the internal circuitry of the headphones after disassembly? This is where that was important. So hopefully you’ve followed along exactly to this point:
1. With the picture that you had taken earlier, you will need to match the colored wires (red and green) to their respective positions as they were when you first took apart the headphones. Here you will need to solder the appropriate wire to the appropriate contact in the photo.
2. Connect the end of the jack you didn’t clip off into a computer, phone, or MP3 player to make sure that the headphones are working. After this, you can move onto putting the headphones back together.
Step 6: Reassembling the Headphones
Now that your headphones are working. It is time to put on the finishing touches and put them back together. This is where you use the self-setting rubber to start securing the cable to the headphones.
1. Use the self-setting rubber to attach the new cable to the headphones, so it is securely locked into place.
2. For added wire security, make sure to use the self-setting rubber to join the wire where it meets the body of the headphones. This will keep the cable from becoming loose and reduce the risk of the cable becoming damaged later by being firmly in place.
3. To reassemble the headphones from here, just place the headphones back together and put the screws back into place and screw them securely in place. Do not screw them so tight that it is difficult to remove them later. If the screws are too tight, you could possibly have stripped them and cause more damage to the insides of the headphones again.
4. Reattach the ear cup carefully so that they aren’t damaged or torn during the process. If you don’t exercise care when doing this, you will risk ripping and tearing the ear cup and may need to replace that piece as well.
5. After this, test the headphones to ensure that they are still working. If they are working, as they should be, you can go ahead and reassemble the headphones in the reverse order of which you took them apart.
Some Final Words of Advice on Headphone Care
When it comes to being able to extend the life of your headphones and keep them in the best shape possible, try to treat them like you would your dream car. That might sound crazy, but you are going to do things like keep the car clean, keep it in the garage, and make sure all the gauges are working properly. Treat the headphones with the same care by following the tips below:
#1 – Clean your headphones on a regular basis. This keeps them functioning at their top performance and also prevents the build-up of bacteria that can occur when wearing your headphones. Not only can this damage the headphones, but it can also affect your ears and health so keep them clean.
#2 – Always take care of the cords. These are like your dream car’s fuel gauges. If they aren’t working properly, then your headphones won’t perform at their best or at all due to the mishandling of the wires and potential damage that can occur due to that.
#3 – Keep the headphones in the case. This is like putting your dream car in the garage when you’re not cleaning or driving it. Never put them in a bag with other things or your pocket if they’re earbuds.
#4 – Do not share your earbuds with others. This can apply to headphones as well and goes to keeping them clean. Sharing your earbuds or headphones with someone else can lead to whatever bacteria they have in their ears affecting you. If you decide to allow someone else to use your headphones, be sure to clean them immediately before use.
In Conclusion
Hopefully, this addresses your questions on whether you can save your headphones from the fate of the recycling bin and helps you feel more comfortable in your ability to fix these problems yourself. Try to study up a little about repairing electronics and from here on out it should be a breeze!