How to Fix Earphones with No Sound from One Ear
This post may contain affiliate links which means that, if you choose to make a purchase, I may earn a small commission at no extra cost to you.
One of the most common problems with earphones is sound coming from only one ear. For cheaper earphones, it may be simpler just to replace them. For more expensive earphones, buying a new pair is not always an option.
How to fix earphones with no sound from one ear? The cause may be broken or disconnected wires inside the cord or earphones, or it may be problems with connections or the jack. Most of these issues have a potential fix that can be done with a little time and effort.
Having earphones that don’t work can be frustrating. Buying new ones all the time can get expensive. One solution is to fix them. Some problems can be fixed quickly and easily at home. Others take a little more work, but still will save the time and money of buying new ones.
How to Fix Earphone Issues
If the earphones don’t have a warranty or the warranty has expired, doing an at-home fix may be the only option outside of buying a new pair. Earphones costing over $50 are the most cost-effective to fix.
Expensive earphones may have a warranty that will cover any defects. It is important to check before cutting any wires or attempting any of the fixes below. If you’re without a warranty and willing to roll up your sleeves and make your own repair, let’s go!
Assemble the Supplies and Tools
Fixing broken earphones may require only some masking or electrical tape. However, for some of the more advanced fixes, some tools are needed. If you don’t have the tools, they are all pretty inexpensive and generally useful. They can be kept for the next time repairs are needed.
These are the tools you will needs
- Pair of wire strippers
- Pair of wire cutters
- Roll of masking tape
- Roll of electrical tape
- Small sheet of fine-grit sandpaper (optional)
- Solder gun repair kit (for some repairs)
- Piece of shrink tubing
Quick Fix for a Broken Cord Wires
Earphones that only have sound in one ear most likely have a short or broken cord. The less sound in that ear, the closer to the jack the problem probably is. This can be fixed in four easy steps.
Step 1: Identify the Problem Areas
When using the earphones, listen to see which side cuts out. Then go step-by-step to figure out where the problem is.
- Move your hand up and down the cord bending it every ½ inch in order to identify where the wires are shorted out.
- Electrical shorts typically happen next to the jack or the earphones themselves as this is where the most wear and tear occur. These would be the first two areas to check.
- Mark the area identified by placing masking tape on each side of where the short was discovered.
- Leave approximately an inch between the two pieces of tape. This is the area you must secure to keep the wires from moving and to improve the connection.
If you have another pair of earphones, try using them to make sure it is the earphones and not the jack or device that is the issue.
Step 2: Twist the Cord Until You Hear Sound from Both Sides
While the device is playing, move the identified problem area of the cords until you have complete sound.
- The cords will have to be bent, straightened, and twisted to get the severed ends of the wires to make contact within the cords. Once the cords are in the correct position, it is important to hold them steady so that they can be repaired.
- It is important to twist the cord slowly so that the correct position is found. It is less common, but wires could be broken in the center of the cord. The entire length may have to be twisted and moved to find the correct area. Patience is key.
Step 3: Secure the Cord
Keep pressure on the cord so that it does not move. If the cords do shift, the wires inside may no longer be touching.
- Use strong tape, such as electrical tape or duct tape, to secure the cord in the working position.
- Tape tightly so that the pressure of the tape compresses the sheath around the wires maintaining their contact. If the tape is too loose the wire is likely to shift.
To help maintain pressure while taping, pieces of tape can be prepared beforehand making the tape easier to manage with one hand. Assistance from a second person can also make it easier to hold and tape at the same time. Either way, the cords cannot be allowed to move.
Another option is to bend the cord over on itself near the short. Use the tape to hold the kink in place. This will also help decrease the movement of the wires both before and after securing the cord. After taping, check to make sure the sound is still working. As long as the tape is not removed, the earphones should continue to work.
Step 4: Consider Replacing the Earphones
This method is only a temporary fix. It may get your earphones working, but they still have broken wires inside. The wires could still possibly shift with time. If the sound issues continue or resume, it will be time to buy a new pair or attempt further repairs. Some earphones may be under warranty and returning them will result in a new pair of working earphones.
Repairing Broken Wires
If taping does not work, the wires inside the cord may be too badly broken or are not being held in place well enough. In this case, soldering is another option. This may sound like a lot of work, but for expensive earphones, it is still a fairly easy fix and cheaper than purchasing a new pair of earphones.
Step 1: Identify and Mark the Problem Area
The area of the cord with the broken wires will need to be identified by the same process as before. Once it is identified, it will need to be marked by masking tape, again leaving one inch between the two pieces of tape.
Step 2: Strip the Wires to Prepare for Splicing
Carefully cut the shorted area out of the cord. It will be necessary to cut about half an inch of cord on each side (one-inch total) out of the cord to make sure you have removed the break from the cords.
It is important to use wire cutters or another sharp tool to create the kind of cut that will allow the wires on either side to be spliced back together.
Strip back the cord on both sides to expose the wires inside using the wire strippers. The cord should contain three different wires.
- Red wire
- Black or white wire
- Copper wire
The colors may vary slightly, but all cords should have a copper wire and two-colored wires.
Once the wires are exposed, the coating around each wire will need to be stripped back, so that bare wires are exposed. The metal contained in the shielding may be very small and thin. You may need to abrade with sandpaper to expose the wiring. The copper wire is already exposed metal and will need no further stripping.
Step 3: Reconnect the Wires
Twist the wires together matching the colors, red to red, black to black, etc. Several different splicing methods exist. The one used is a matter of choice. Soldering them is also an option. This Instructables video shows one method you can use.
Care needs to be taken to make sure the wires are tight, and no further breaks are created during the process. If using a shrink tube, slip it on one side of the cord and move out of place for now before completing this step.
Step 4: Test the Earphones
Before the wires are covered, plug the earphones into a device and ensure sound is coming from each side. It is easier to adjust the splice now than after wrapping the wires. If there is still no sound from both earphones and the splice is not the issue, the headphones may be more damaged and not fixable.
Step 5: Covering the Wires
The final step is to recover the wires using shrink tubing or electrical tape. Both will provide insulation to the wires and protect the splice so that it will last longer. Either will work fine.
Repairing Inside the Earphones
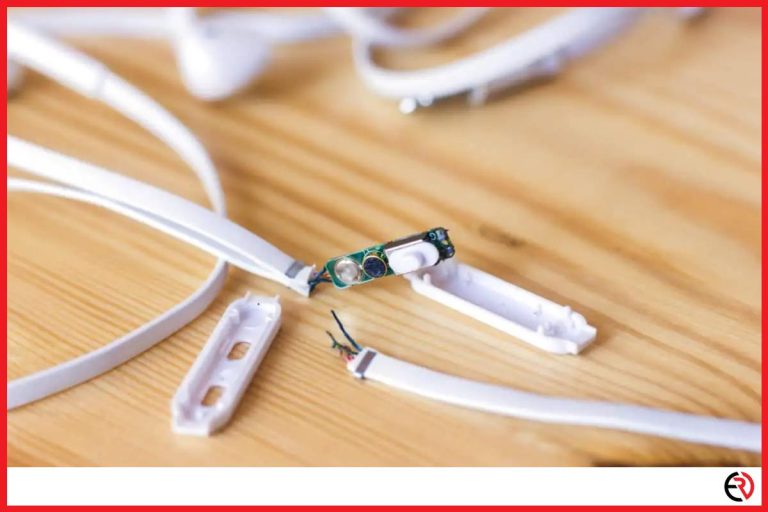
When a problem cannot be found in the cord, the wires may be disconnected inside the earphones themselves. The wires in the cord attach to terminals in the circuit board inside them. These connections can come detached from these terminals. It is possible to carefully solder the wires back onto the terminals by following these directions.
Step 1: Determine the Source of the Damage
It is important to decide if the damage is in the earphone itself or the cord. Moving the cord is likely to identify the problem area if it is the cord. However, if the side has no sound, not even static, and moving the cord does not help, the damage is likely in the earphone.
Once you determine that the damage is in the earphones, plug them into an audio source. Continue to have an audio source playing throughout the process to help ensure the correct problem has been fixed.
Warning: The following steps are to be done at your own risk. If your earphones are under warranty, attempting these steps will likely cancel that warranty. Follow the step below only as a last resort. The procedure will work on earphones, but as with any DIY, it is not guaranteed.
Step 2: Open the Defective Earphone
This will require a small thin tool, such as a pocketknife. Gently insert the tip of the tool into the groove where the two halves of the housing come together. Push down and give the tool a sharp twist.
The earphones should pop apart. Unless the earphones are designed to be opened, superglue will be needed to put them back together once your repairs are done.
Step 3: Inspect the Earphones
The earphones should have two copper wires that run from the cord to different terminals around the edge of the circuit board. The wires may be damaged, broken, or have come loose from their terminals. If no damage is found, the fault may be lower in the cord, close to the jack.
Step 4: Remove Old Solder
It is important to have clean connections to solder to ensure the wires make good new connections; otherwise, the sound will not be clear.
- When the wires have pulled away from their terminal, lay the end of the desoldering braid flat over the blob of solder.
- Heat the braid with soldering iron where the materials meet.
- The braid will absorb the old solder as it melts.
- After the old solder is removed, this process can be repeated as necessary to remove any other solder.
The end of the braid will need to be cut off between each use. Only remove the solder in the area that needs to be fixed. Desoldering braids or wicks can usually be purchased at craft or hardware stores.
Step 5: Solder the Broken Wires Back in Place
- Reattach the loose wire to its terminal.
- Once it is in place, carefully place a piece of .032 diameter electronics solder on the connection.
- Use the soldering iron to heat the solder until it melts.
- Leave the earphones in place to allow the solder to harden, thus attaching the wire back to its terminal. Each loose wire can be reattached in this way.
When both wires are broken, each one can be attached to one of the terminals on the circuit board. It does not matter which wire goes to which terminal as long as one wire is attached to each terminal.
When soldering, it may be helpful to use a table clamp or pair of pliers to hold the cord. It is important that the cord does not move throughout this process. Otherwise, the new connection may be faulty or come loose.
Step 6: Test the Earphones
This step can be done before or after the earphones are put back together. Plug the earphones in and test to make sure both sides are working. If the sound is still not working, this may be caused by the solder not holding. However, if you have done everything right, they should be working good as new.
Repairing the Jack
If no damage is found inside the headphones and the cord appears to be fine, the other option is the jack that plugs into your device. This can also be repaired with solder with a process similar to repairing inside the headphones. The same tools will be needed.
Step 1: Remove the Barrel from the Jack
The jack should have a protective plastic barrel. This will need to be removed and the rubber coating will need to be peeled back to expose the wires underneath.
- Once the barrel is removed, the broken wires should be apparent and can now be soldered back together.
- Some earphones have jacks that are designed to screw or be pulled off using just a small amount of force.
For some earphones, there is no way to remove the jack. The only choice is to snip it with wire cutters or scissors. A replacement jack can be purchased for $8-10. The new jack can be soldered to the exposed wires.
Step 2: Connect the Wires to the Jack
Unlike within the earphones, the wires do have specific terminals in the jack. It is important to make sure that the different colored wires are running to the correct terminal.
With most earphones, the red wire goes to the terminal on the right — the green wire to the terminal on the left. Finally, the copper wire should go to the large central terminal.
Some newer replacement jacks have a small hole to insert the broken wire through. With these jacks, soldering is not needed. For those that need soldering, the new replacement jack will have instructs stating which colored wires go to which terminal.
Step 3: Test the Earphones
When the fix is completed, plug the earphones into a device and test. If there is still no sound, it is possible the soldering did not hold or that the wires were connected to the wrong terminals. The plastic barrel and rubber coating would need to be removed again to correct these mistakes.
Preventing Earphone Breaks
The easiest way to fix earphones is to make sure the cords do not short out, break, or become damaged in some way. Prevention of the problem is easy to do.
- Pull the plug, not the cable, pulling firmly, but not sharply
- Do not leave earphones plugged in when not in use
- Store earphones with the cord carefully wrapped to make sure it does not kink
- Do not sleep with earphones in
- Avoid contact with water
- Purchase higher quality earphones, especially ones with braided cords.
Buying a higher-quality set of earphones, storing them in their case, and taking good care of them can prevent damage. But, if the earphones still get damaged and are not under warranty, these instructions can be used to fix them and save buying a new pair.


